Subject Area: Design
Level of complexity: Beginner
Approximate Time to complete: 15-30 minutes
Companion Workbook (twbx): CustomShapes.twbx
Additional Resources on the web:
- http://www.tableau.com/public/blog/2013/10/creating-and-utilizing-custom-shapes-2171
- http://www.interworks.com/blogs/iwbiteam/2012/01/27/using-custom-shapes-tableau
Custom shapes in Tableau are fast and easy to use and provide the user unlimited control over mark shapes. Tableau shapes and controls can be found in the marks card to the right of the visualization window. There are plenty of options built into Tableau that can be found in the shape palette, but what if you want to use custom shapes for effect, branding, etc.?

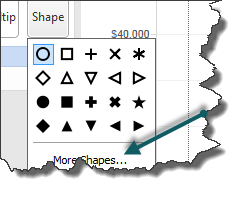
To select additional shapes, click "more shapes", and the window you will see looks like this:

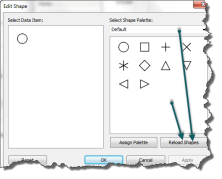
There is a folder in "My Documents" called "My Tableau Repository" where you can find a shapes folder. Within this shapes folder, simply create a new folder for your shapes and name it an informative name. Save any custom shapes you would like to use in your visualization into this file.

To load your shapes, hit reload in your shapes palette and then select the new shapes folder from the drop down menu.
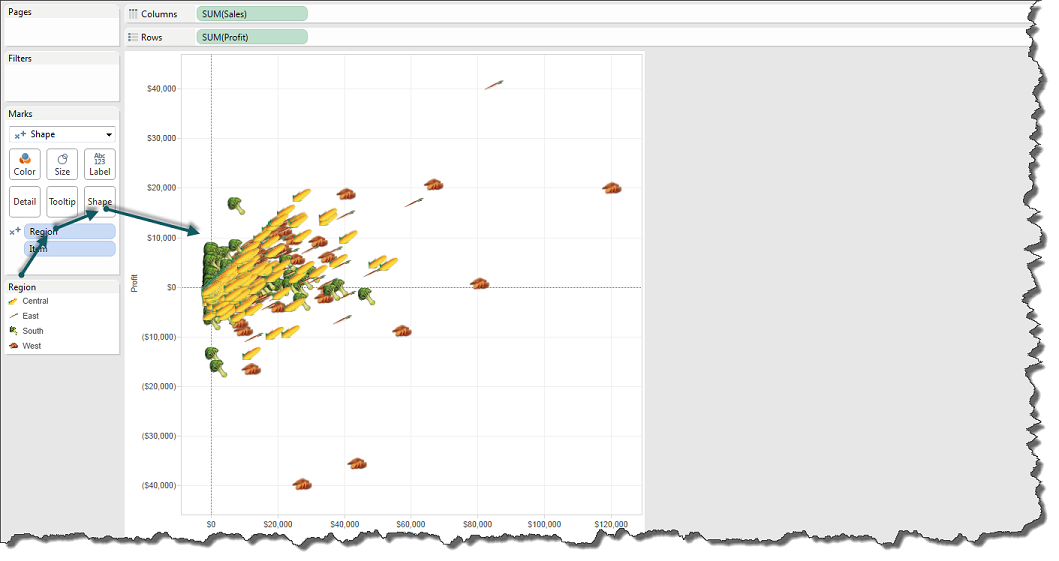
Here you can see our custom produce folder where we are going to assign vegetable shapes to our scatter plot. Our scatter plot has a category, "regions", that has four classes that we have assigned each a single shape.

Custom shapes are powerful when telling a story with your visualizations. You can create unlimited shape combinations to show mark points and create custom formatting.
Be careful, however, to not over use shapes. The customization is available to help better inform your reader and over involving custom shapes can convolute your end visualization and hinder your end-user from interpreting the data correctly and efficiently. It is best practice to always check Tableau's shapes before importing custom shapes; years of research have gone into Tableau's selection of custom shapes based on industry best practices.