Subject Area: Design
Level of complexity: Intermediate
Approximate Time to complete: 30 minutes
Companion Workbook (twbx): HomeAndHelpButtons.twbx
Additional Resources on the web:
- http://breaking-bi.blogspot.com/2013/06/creating-fast-navigation-buttons-in.html
- http://kb.tableau.com/articles/knowledgebase/creating-table-contents-navigate-other-dashboards
- http://www.alansmitheepresents.org/2013/09/tableau-as-web-application.html
This article goes over two separate types of navigation/information buttons that can be added to a Tableau Dashboard - a "home" button and a "help" button.
A Home button is used when multiple dashboards are linked together in order to provide a route for the end user to navigate back to the original dashboard.
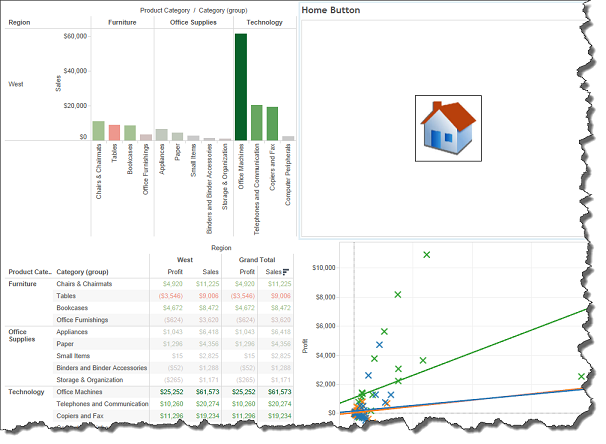
This is often used when a workbook starts out with a high level, main dashboard, and then there are different types of filters and actions that can navigate to a secondary dashboard that often depicts a lower level of detail. A home button is created as its own worksheet, that is thrown onto the secondary dashboard and given a dashboard action that points towards the main dashboard. An example of a Dashboard that is using a sheet as a home button is shown below:
The creation of the worksheet that is used as a home button is as follows:
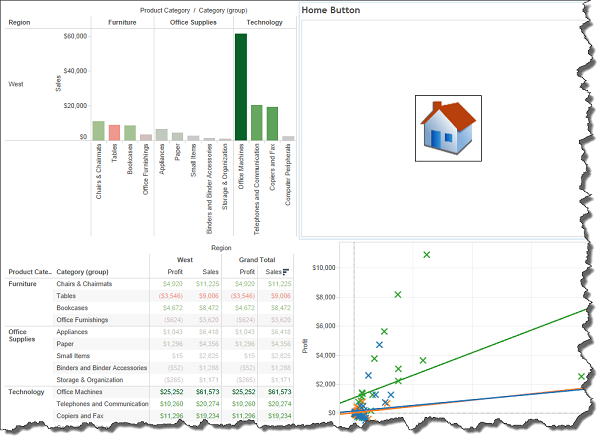
To get a data point on the view, min([Number of Records]) was thrown on Rows to get a single data point of 1. This enables us to use the Shape button on the marks card to select an image for the single data point that will represent our home button.
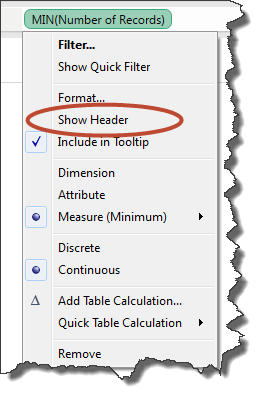
To remove the axis on the view, drop down on the Number of Records pill on the row shelf and un-select ‘Show Header'
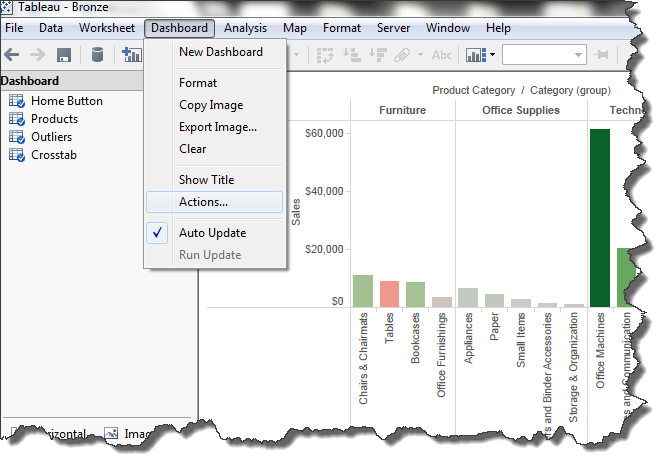
At this point you are ready to include the home button onto a dashboard. Drag the home button onto the dashboard that you wish to add a navigation link back to your primary dashboard. Under the dashboard tab at the top of Tableau desktop, drop down and Select ‘Dashboard Actions':
In the dialogue box that pops up select ‘Add Action' -> ‘Filter'. You are now in the dialogue window to set up your filter. The final set up for the Home Button is:
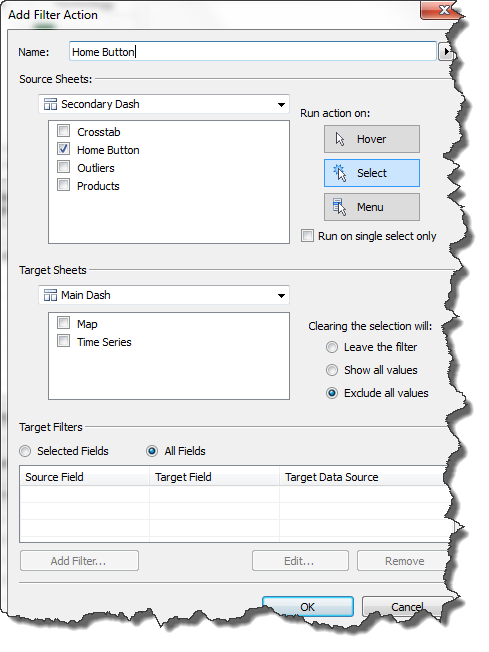
Notice, that the source sheet is selected from the ‘Secondary Dash' and Home Button is checked. The Target Sheet is the sheets that you want to navigate to, if you select your ‘Main Dash' as the target sheet selecting the home button will move the end user to that dash. On the right side of the dialogue box you have options on when to run the action (on hover, select, or in the tooltip using the menu option) as well as what to do once the selection is cleared.
The selections you make on the sheets to be affected on the main dash do not matter as your home button is not tied to any fields and will not change anything. It is best practice to leave all sheets unchecked though in case that there is a field that could be affected.
This button now provides the end user a way to navigate back to the original dash that a filter action moved them away from.
Help Button
We can also use the creation of a shape on a stand-alone worksheet to provide instructions to our end user. For this example, create a sheet in your workbook in the exact same way that we created the home button. Instead of linking an action to this worksheet though, we are simply going to add instructions to the tooltip of our image.
To do this, select ‘Tooltip' on the marks card and add in any custom text / data fields that you want to us in order to provide information to the end user.

Now on a dashboard you can point your end user to this help button and be able to communicate instructions to them through the pop up tool tip. This will help you save space on your dashboard and keep a clean look.
The final look of this on a dashboard will be as follows (Help button purposely enlarged to take up half the dashboard for example purposes):
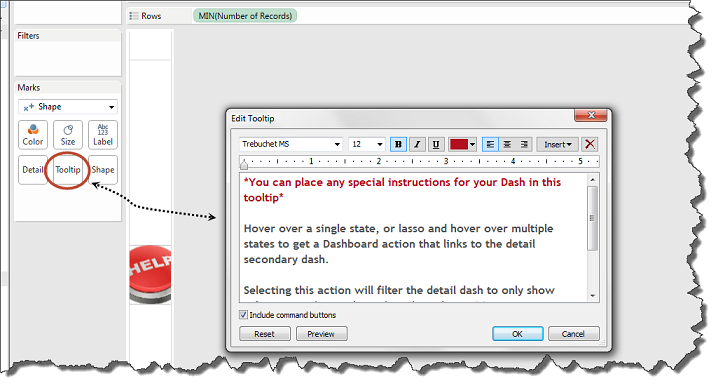
The tooltip is displayed above because the user's mouse is hovering over the ‘Help' button.