Save your dashboard filters with Custom Views, now for the Viewer role
When it comes to business intelligence, people have their routines. Some start their day by checking a critical business dashboard in their browser or using Tableau Mobile to direct their daily priorities, while others have a weekly analytics check-in to see how close they are to achieving their goals. To serve these different needs, people tend to filter and interact to get to their version of a dashboard—just the way they want it. If this sounds familiar, you could be saving time by creating one or multiple Custom Views on Tableau Server or Online.
Today, Explorers and Creators can create Custom Views, but based on feedback from customers, we're extending this functionality to the Viewer role in Tableau Server and Tableau Online 2019.2 so that everyone can customize their views based on their goals.
Our user community is incredibly important to us, and we listen carefully to feedback that we read in the Community Idea Forum. We’re thrilled to deliver on this frequently requested feature and enable people to see and understand data faster!
What is a Custom View?
A Custom View is a way to save the current state of a dashboard or view after you’ve made selections or changes like sorting, filtering, panning, zooming, drilling down, or altering parameters. Changes can be saved into scenarios, with each scenario being its own Custom View. You can easily save these scenarios as a default from the dialog menu so the interactions are reapplied automatically whenever you access this dashboard or view. Think of Custom Views as a way to bookmark your data.
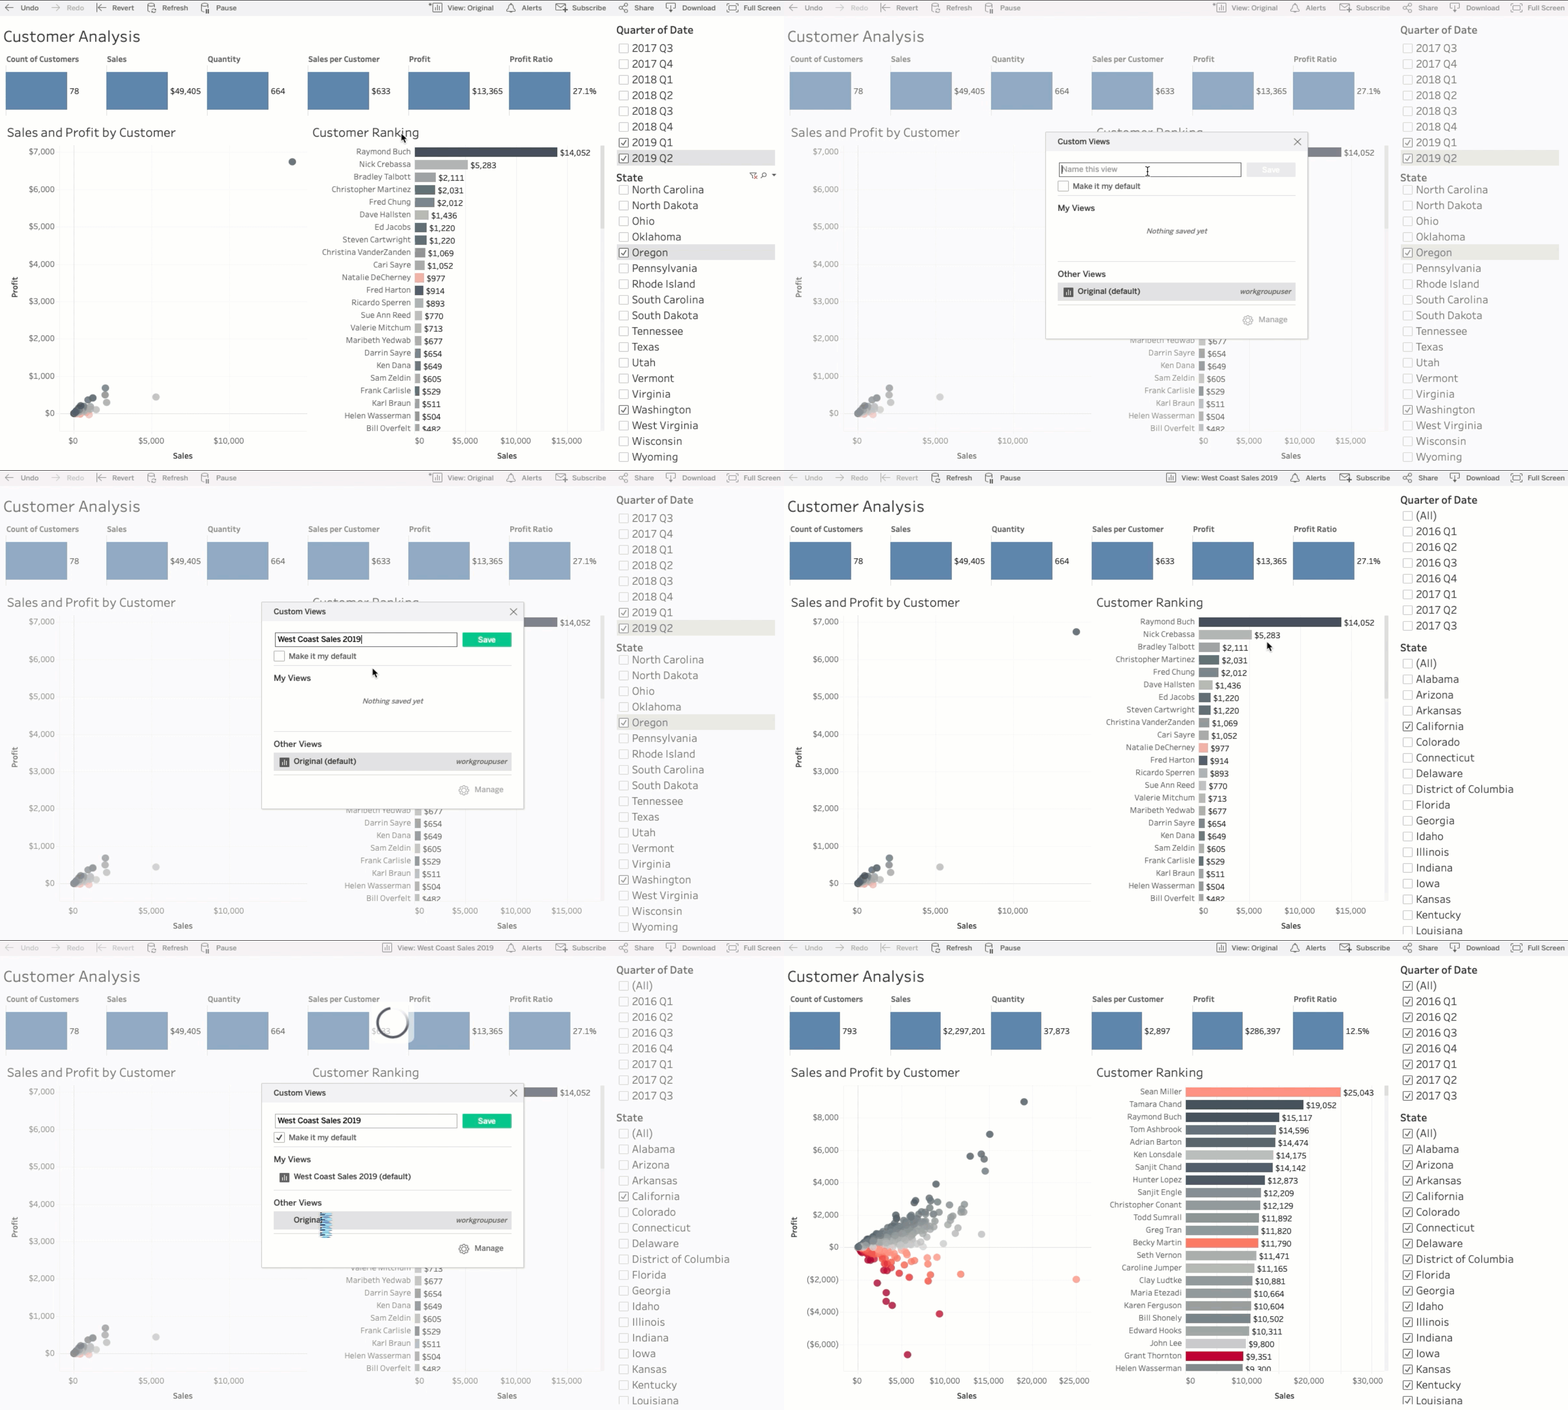
Imagine, for example, that you’re the West Coast regional manager of a national store chain. You open the national sales dashboard every morning and you apply the same filters. First you filter State on Washington, Oregon, and California. Then you filter the Date field to include Q1 and Q2 2019. This shows your region’s year-to-date performance.
Since you’re the regional manager of the West Coast, you decide to create a Custom View with the State and Date filters. Every time you open the dashboard, you can quickly access a version with these changes. You can spend time digging into the data, not repeating the same operations day in and day out.
How to create Custom Views
When you have a dashboard exactly as you want it, with all the filters, sorts, selections and zooms applied, click the View option in the toolbar. Enter a name for your Custom View that helps you remember what interactions it has. Then click Save to preserve the Custom View.

As an option before saving, you can ‘Make it my default’, which means that, for you, any link that points to this dashboard’s original view will automatically include your modifications. One major reason you might want to do this is so that one of your favorites always points to your Custom View, rather than the original version.
Let’s suppose you crafted a perfect modified dashboard, but want to get back to the original or a different view. Click the View action in the toolbar to bring up a list of all the different Custom Views you’ve created, listed under My Views. The original view and public Custom Views created by others with an Explorer or Creator license appear under Other Views.
Share or Subscribe using Custom Views
Now that you have your Custom View, you share the link with others who have access to the dashboard or have it automatically sent to your email at a regular schedule. Share and Subscribe options work seamlessly with Custom Views. Access these options from the viz toolbar.
Try Custom Views today
Custom Views are a great way to quickly compare different scenarios, save time from reapplying interactions, and get customized subscriptions. Download the newest release and learn more about all the new capabilities in the Tableau 2019.2.
Relaterade berättelser
Subscribe to our blog
Få de senaste Tableau-uppdateringarna i din inbox.


