User Attribute Functions Tutorial

Goals
This tutorial will demonstrate how you can leverage user attribute functions to create customized views based on user attributes. This feature is only available in Tableau Cloud.
With Connected Apps you can embed custom attributes in a JWT to create highly customizable experiences by leveraging the calculations USERATTRIBUTE() and USERATTRIBUTEINCLUDES().
How it works
Let's examine a sample JWT that you can use when authenticating with Tableau:
{¬"sub":·"myuser@tableau.com",¬"aud":·"tableau",¬"jti":·"c5aeefbd-26b1-4a0b-b0b1-54b21753aa1b",¬"iss":·"connected-app-id",¬"scp":·[¬"tableau:views:embed"¬],¬"exp":·1662891195¬}
The JWT above contains the information needed for the connected app to authenticate on behalf of user myuser@tableau.com. Now, let's say that we want to create custom Tableau views based on the user role and sales regions within the organization. The app could send the following JWT:
{¬"sub":·"myuser@tableau.com",¬"aud":·"tableau",¬"jti":·"c5aeefbd-26b1-4a0b-b0b1-54b21753aa1b",¬"iss":·"connected-app-id",¬"scp":·[¬"tableau:views:embed"¬],¬"exp":·1662891195,¬"role":·"Account·Executive",¬"regions":·["Central",·"South"]¬}
When the Tableau viz is loaded, attributes "role" and "region" will be made available to the new user attribute calculations. More specifically:
- USERATTRIBUTE("role") would return "Account Executive"
- USERATTRIBUTEINCLUDES("regions", "Central") would always return true
- USERATTRIBUTEINCLUDES("regions", [Region]) would return true for those rows where [Region] is either "Central", or "South".
Let's dive into a more concrete example.
Exploring a sample connected app with user attribute functions
- Step 1: configure your Tableau Cloud site
- Step 2: clone and setup the demo connected app
- Step 3: Build a demo visualization that leverages user attribute functions
- Step 4: Handling multiple values
- Step 5: Creating filtered views
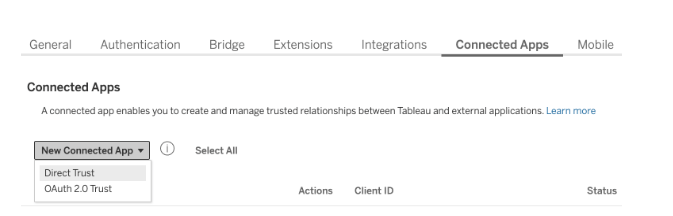
a) Create a connected app by navigating to the settings from the left navigation pane, and in the settings area, click on the Connected Apps tab. Then select "Direct Trust" from the "New Connected App" dropdown.
b) Give the connected app a name, and click on "Create"
c) Click on the app you just created, and copy over its Secret ID, Secret Value and Client ID, as these will be required in Step 2
d) Click on the three dots on the right side of the app name and select "Enable"

e) Click on tab "Authentication" and enable the setting which allows attributes to be captured during authentication

a) Clone repo https://github.com/tableau/uaf-test-app
b) Go to the app folder and perform the following setup steps (only needed once)
- Update file config/default.json with values obtained at step 1.c
- Run npm install
c) Launch the app by running node main.js
d) Visit http://localhost:5005, and the test app should successfully:
NOTE: when building your own application, ensure that your JWT is being created server-side, and the secret is not leaking to the client where unauthorized users could capture it.
Let's start with a very simple viz that showcases how attributes can be captured:
a) Visit your Tableau Site and upload workbook "HelloWorldUAF.twbx", which can be found under the resources folder of the project cloned in Step 2
- This workbook consists of a viz with a single field, which is a calculation with formula USERATTRIBUTE("attr")

b) Open the published viz on web, and copy its URL
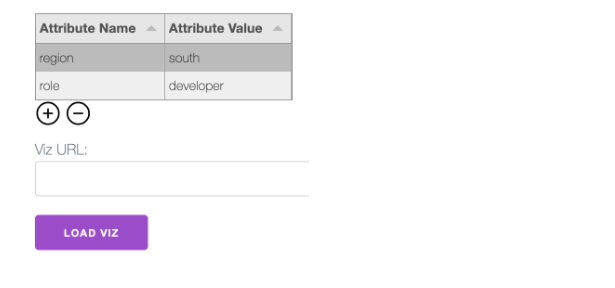
c) Go back to the test app, and:
- Add a new attribute to the attributes table – make sure its name is "attr", which is the value we used in our viz (note: attribute names are case sensitive)
- Paste the viz URL and click on "Load Viz"
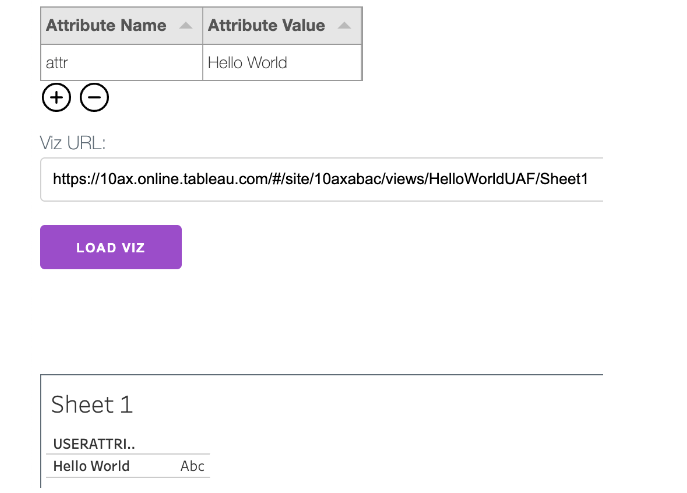
You can change the attribute value and reload the viz, which should display the updated attribute value.
Function USERATTRIBUTE() is useful when you want to retrieve attributes with a single value. When dealing with multiple-valued attributes, the function USERATTRIBUTEINCLUDES() is a better alternative. Let's create a simple viz that demonstrates its behavior.
a) Back to your site, upload workbook "MapRegionByColor.twbx", which can be found under the resources folder of the project cloned in Step 2
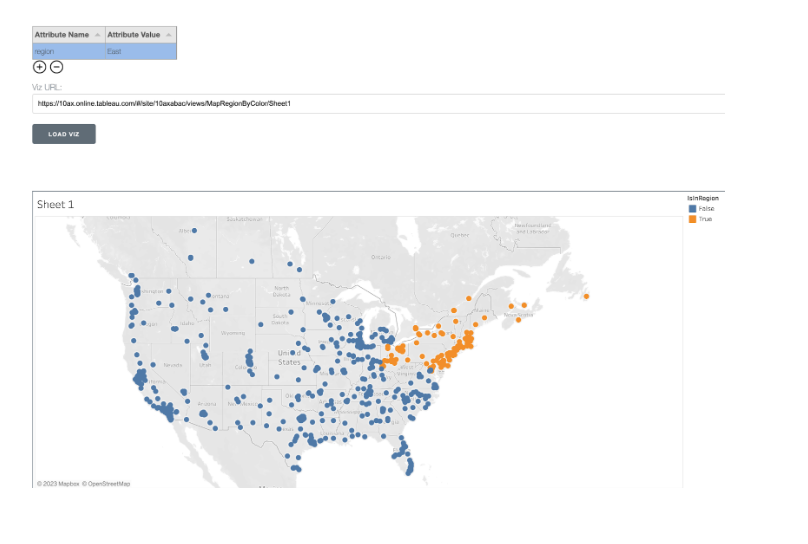
- This workbook contains a map viz, and the mark colors are using a dimension with formula: USERATTRIBUTEINCLUDES('region', [Region])
- Function USERATTRIBUTEINCLUDES() accepts two arguments: the name of the attribute and an expected value. If the attribute exists and one of its values matches the specified expected value, the function will return true. If there's no attribute with the provided name or if there is but none of its values matches the expected value, the function will return false.
b) Back at the test app, add attribute "region" with value "East"
c) Paste the viz URL and load it:
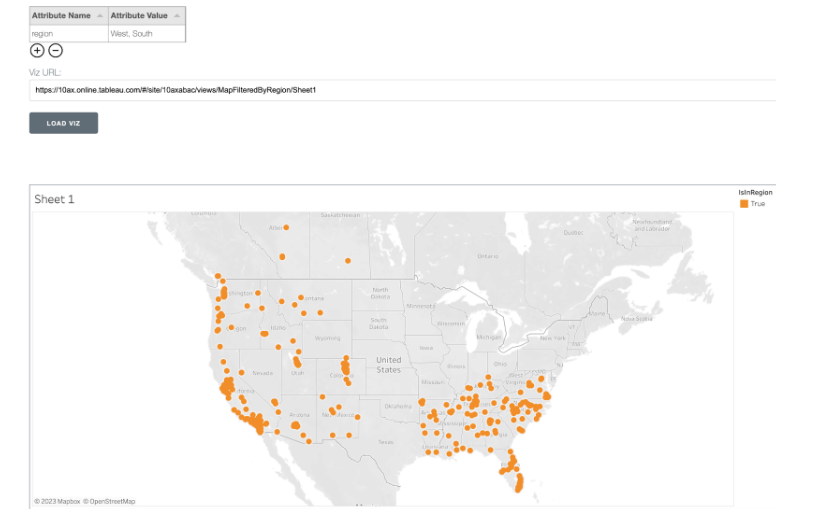
d) Now, update attribute region with value "West, South", and reload the viz:

The test app takes a list of comma separated values and splits them into a list attribute values which is passed in as part of the JWT.
Finally, let's explore how user attribute functions can be used in filters.
a) Upload workbook "MapFilteredByRegion.twbx"
b) This workbook is based on the viz we just used in Step 4, except it also contains a data source filter based on USERATTRIBUTEINCLUDES():
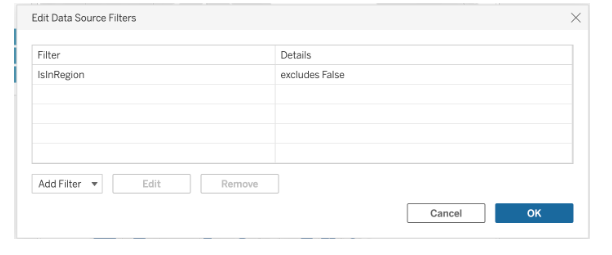
c) Back at the test app, add attribute "region" with value "East"
d) Paste the viz URL and load it:
You can try out different attribute values and see results being filtered out accordingly.
Resources
- For more details on how to create connected apps, please refer to https://www.tableau.com/developer/learning/connected-apps-tutorial.
- You can sign up for a Tableau Cloud developer site at:https://www.tableau.com/developer/get-site
Last updated: April 04, 2023