Get Ask Data in your dashboard for smart, simple self-service analysis
Since launching Ask Data in February 2019, scores of customers have told us how they’re unlocking deeper insights by asking natural language questions and getting answers back as visualizations.
We’ve also heard from you how important it is to be able to ask these questions in the moment as you’re exploring dashboard insights.
Now it’s possible to integrate Ask Data right into your dashboard, enabling easy and powerful, in-context natural language analysis in just a few short steps. All you need is a show/hide dashboard object with Tableau Desktop and Tableau Server or Online 2019.3+. In this post, we’ll walk you through how to set this up.
Empower your users with Ask Data in the dashboard
Integrating Ask Data into your dashboard empowers business users to answer follow-up questions on their own, in the moment and place they arise. Building and viewing dashboards are critical parts of the analytical process. Viewing a viz often sparks people’s natural curiosity to begin exploring data more deeply.
Today’s Ask Data users ask their questions directly on the data source page. Though this is comfortable territory for data stewards, it’s less familiar for some analysts and business users.
With Ask Data in your dashboard, everyone wins. Regardless of someone's expertise with data, they can naturally ask questions about the current dashboard, get a viz back, and keep asking simple ad-hoc questions. They can often immediately unblock themselves rather than depending on others for answers.
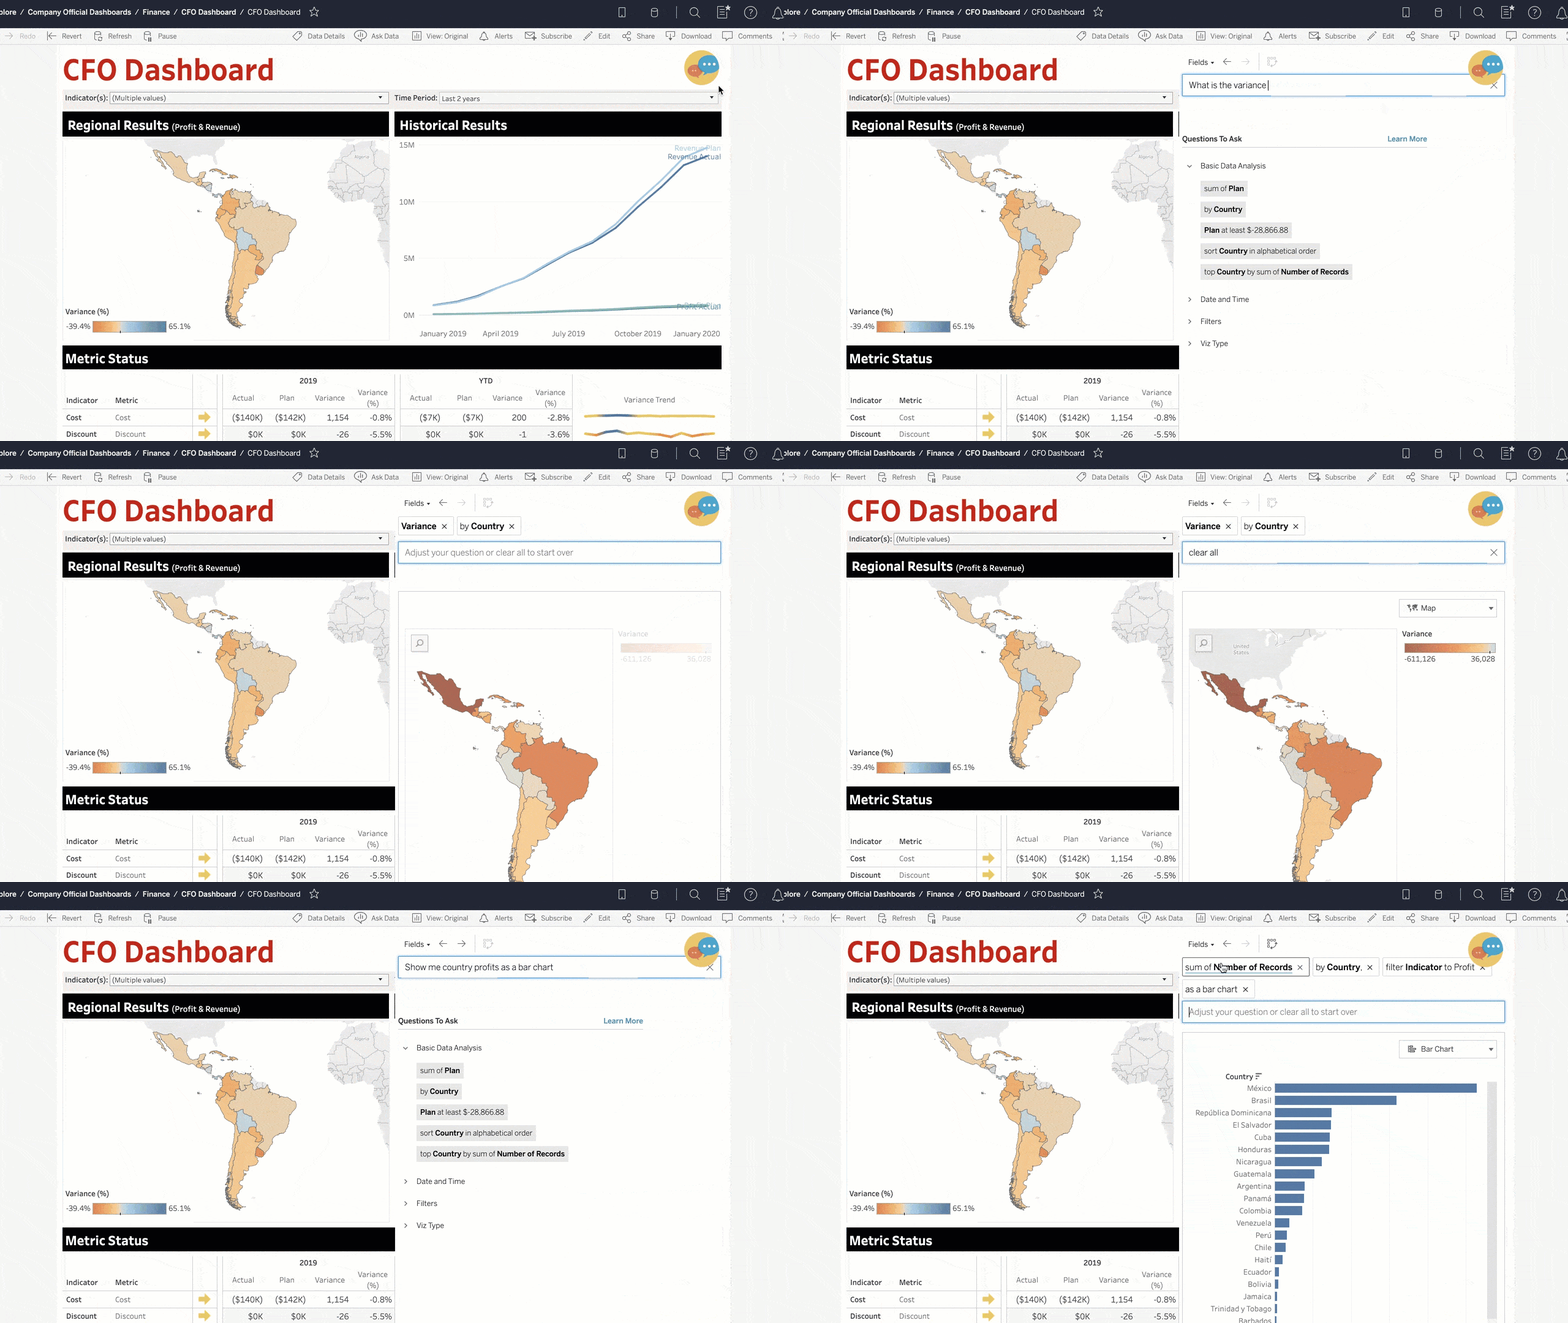
Analysts gain back valuable time, too. They receive fewer follow-up questions and change requests. And in a self-service world, there’s no need to build exhaustive, all-encompassing dashboards intended to answer every question.
Add your own Ask Data dashboard integration
Getting Ask Data in your dashboard is easy. Once you have a curated data source, it takes ten minutes at most.
Before diving in, you’ll want to check your Tableau version and data source. Ask Data dashboard integration works in Tableau Desktop and Tableau Server or Online versions 19.3+. We also recommend using an Ask Data-curated data source for the best experience.
- If you’re a data source owner who’s new to using Ask Data, or if you’d like a refresher on how to curate data sources for Ask Data, head over to our help topic on Ask Data curation.
- If you’re an analyst or dashboard builder who generally works with certified or otherwise pre-cleaned data sources provided by others in your organization, here are some tips to keep in mind before you begin:
- Pick a published data source that answers valuable business questions.
- Choose data sources without row-level security and ensure that your users have permission to connect to the data sources.
- Refresh your memory on the types of questions you can answer with Ask Data. Then outline the core set of questions that you expect your users to ask.
- Ask for help from your Tableau admins if you need assistance with data curation, permissions, or choosing the right data source.
In cases where curating a data source breaks your dashboard experience—such as data sources with table calculations or other fields designed specifically for a dashboard—you can choose to use a separate curated data source just for the Ask Data dashboard object.
Once you’ve confirmed your data source is ready to go, you’re just a few steps away from your dashboard integration.
- Pick a published workbook. Navigate to your published workbook in Tableau Online/Server.
- Get the data source’s URL. Click the Ask Data button in the top toolbar.
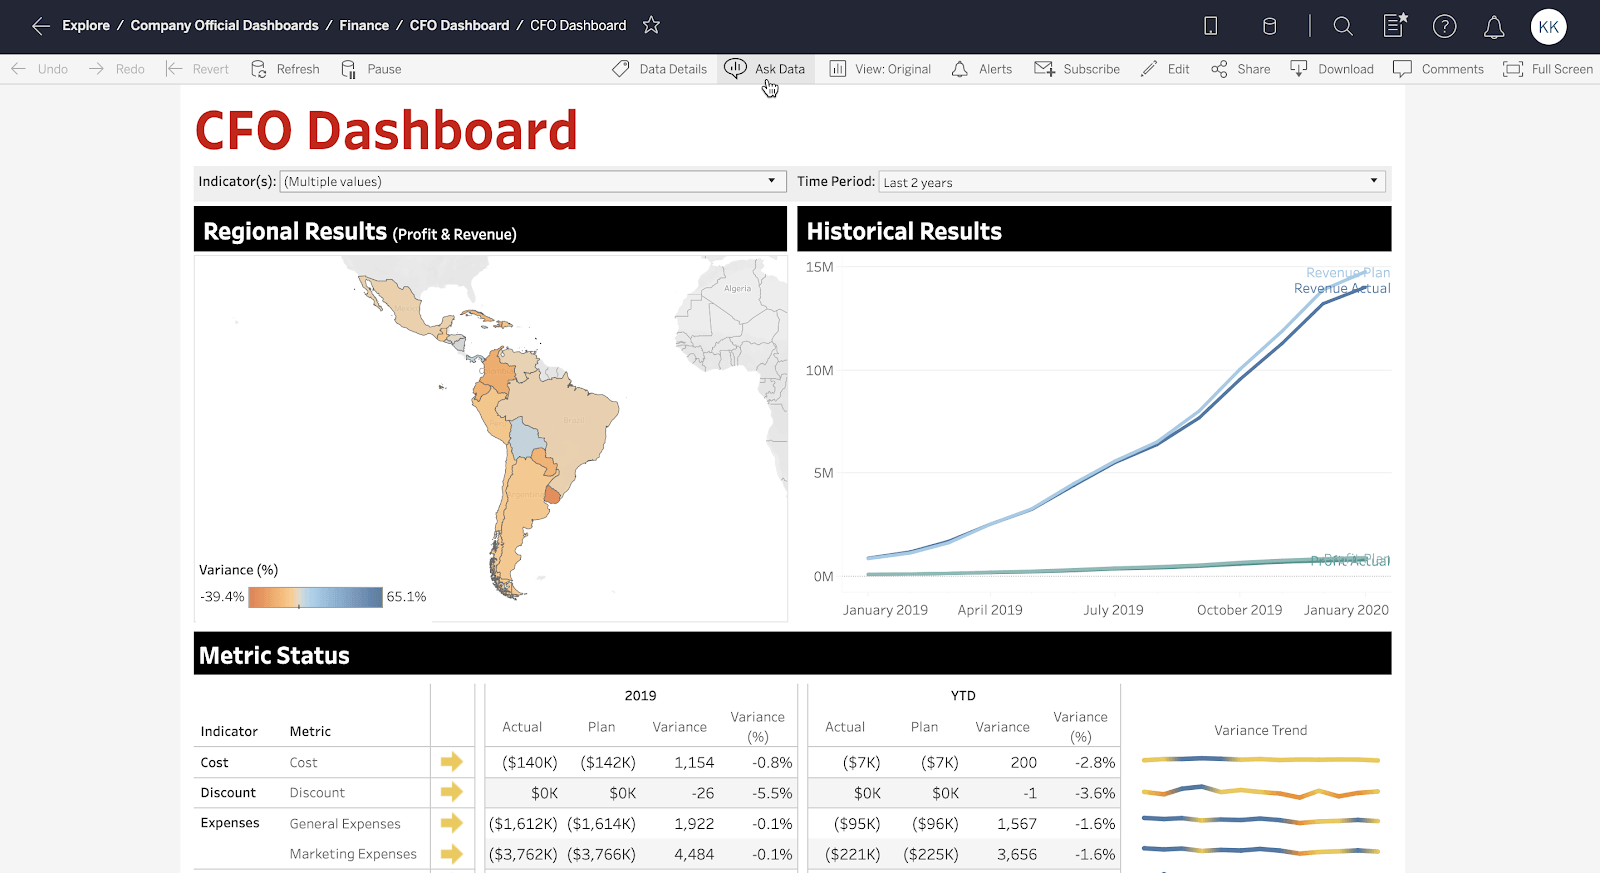
- If you’re prompted to pick a data source, this means the workbook is using multiple data sources.
- Pick whichever you’d like to use with Ask Data.
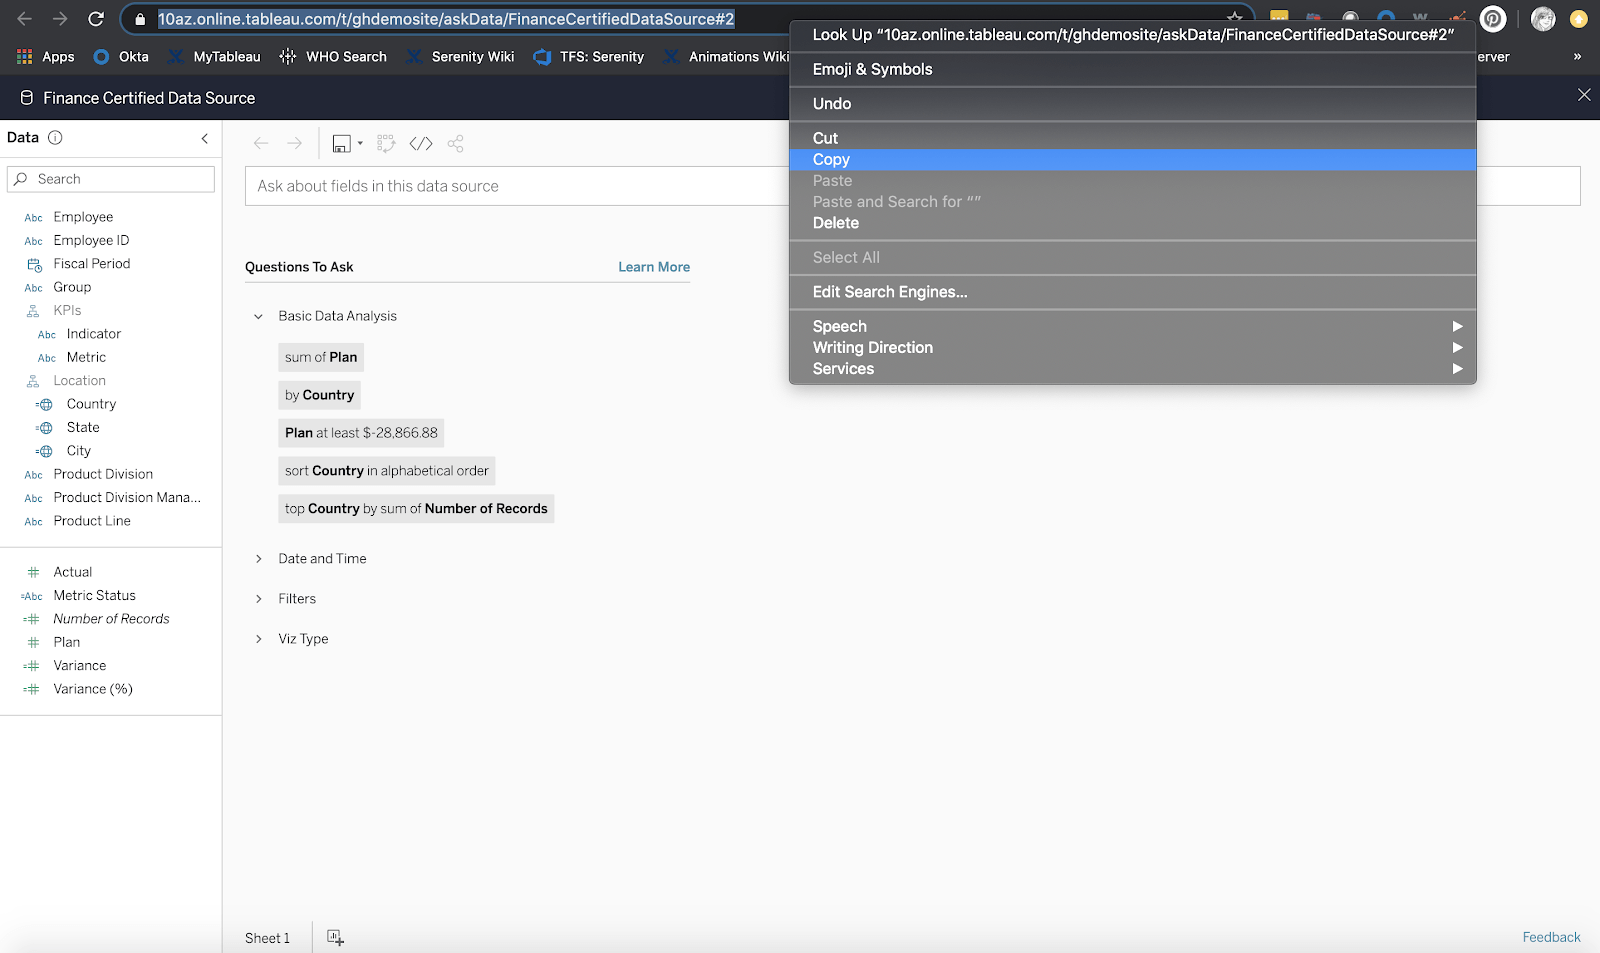
- Copy the URL from the new browser tab that opens. The URL will look like this: https://[Tableau Server URL]/askData/[Data Source Name]
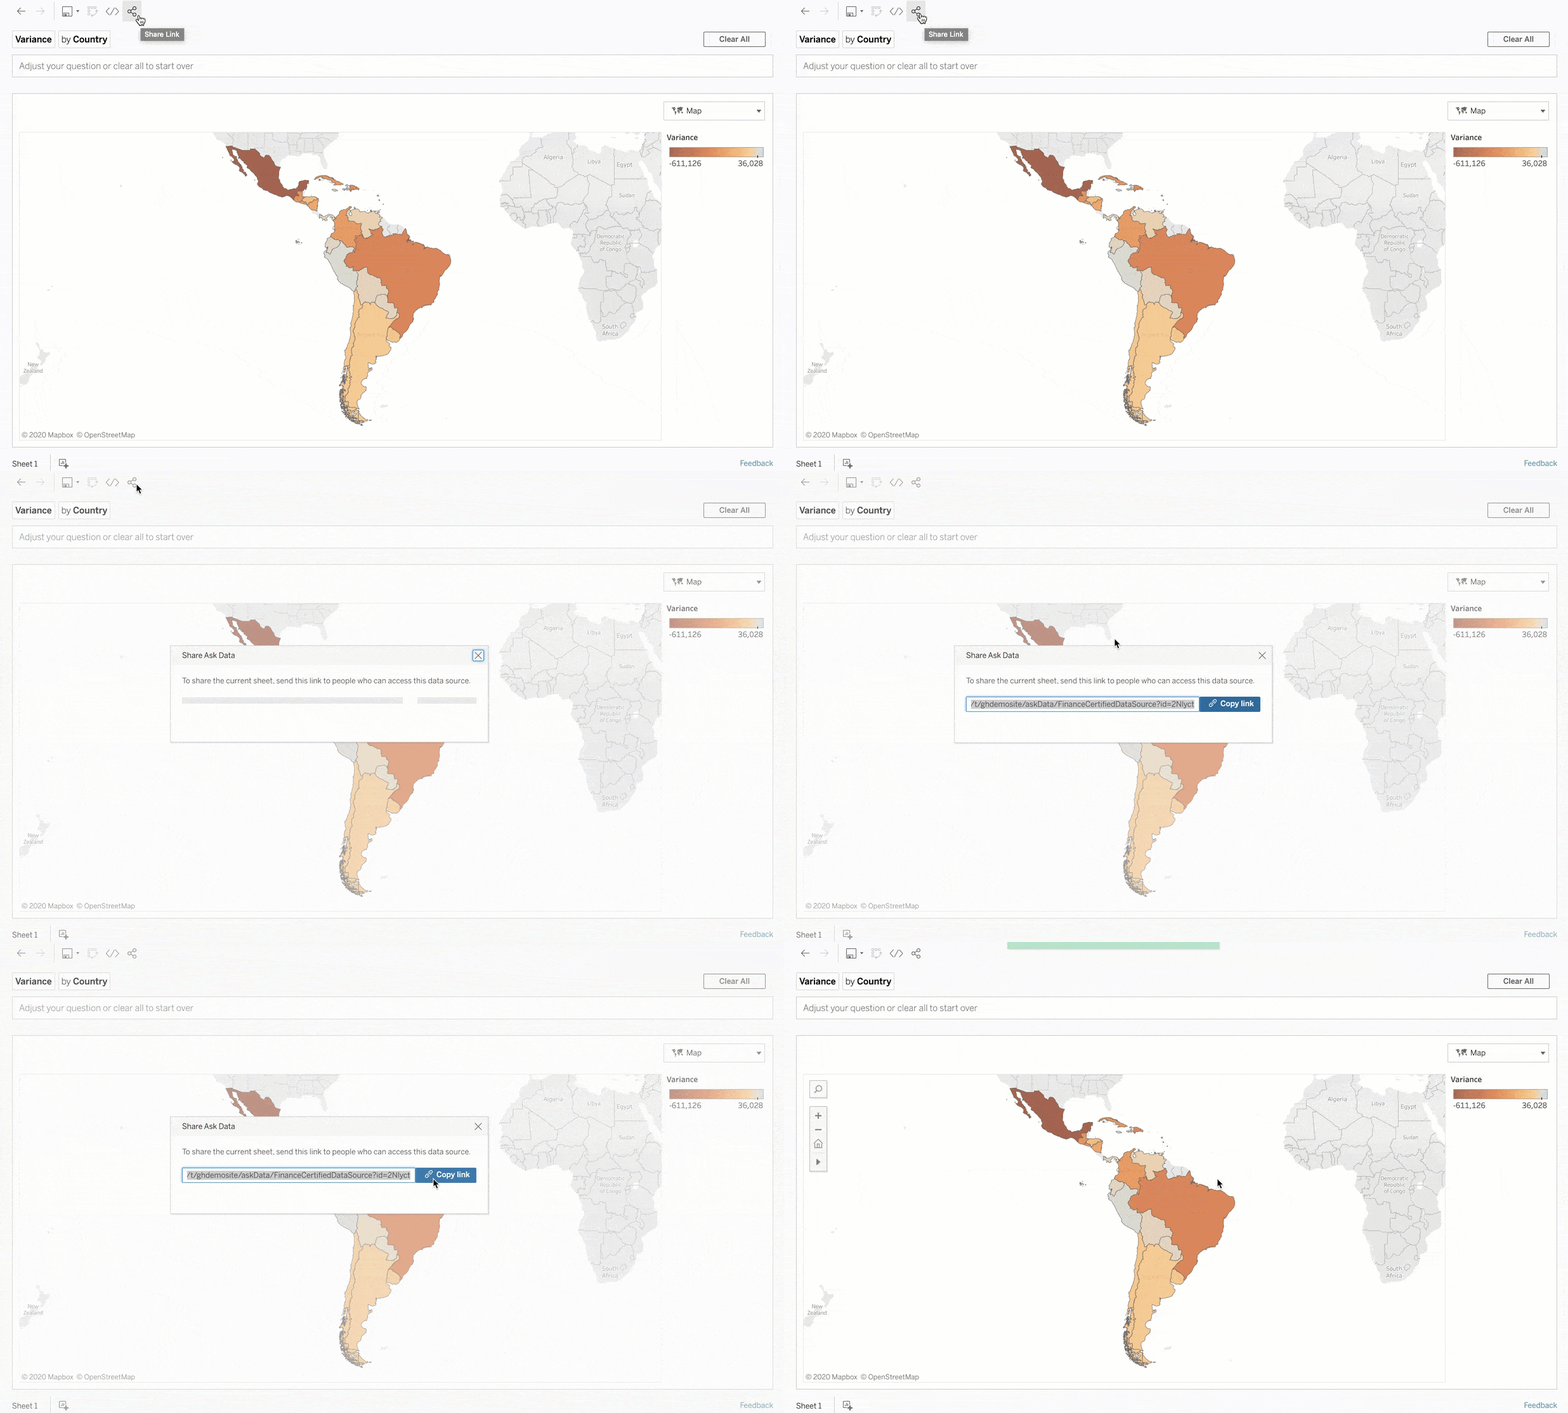
- Or, if you’d like to start your users off with the answer to a specific question, you can ask a question in Ask Data and then copy the sharing URL. This will link you directly to that answer as a starting point.
- Publish the data source using these instructions here.
- Use “Explore” to find other data sources published by your organization (just note: they may not all be curated for use with Ask Data).
- Or, just practice this example with the Superstore workbook and its sample data source.
If your workbook uses an embedded data source instead of a published one, not to worry. You can do one of the following:
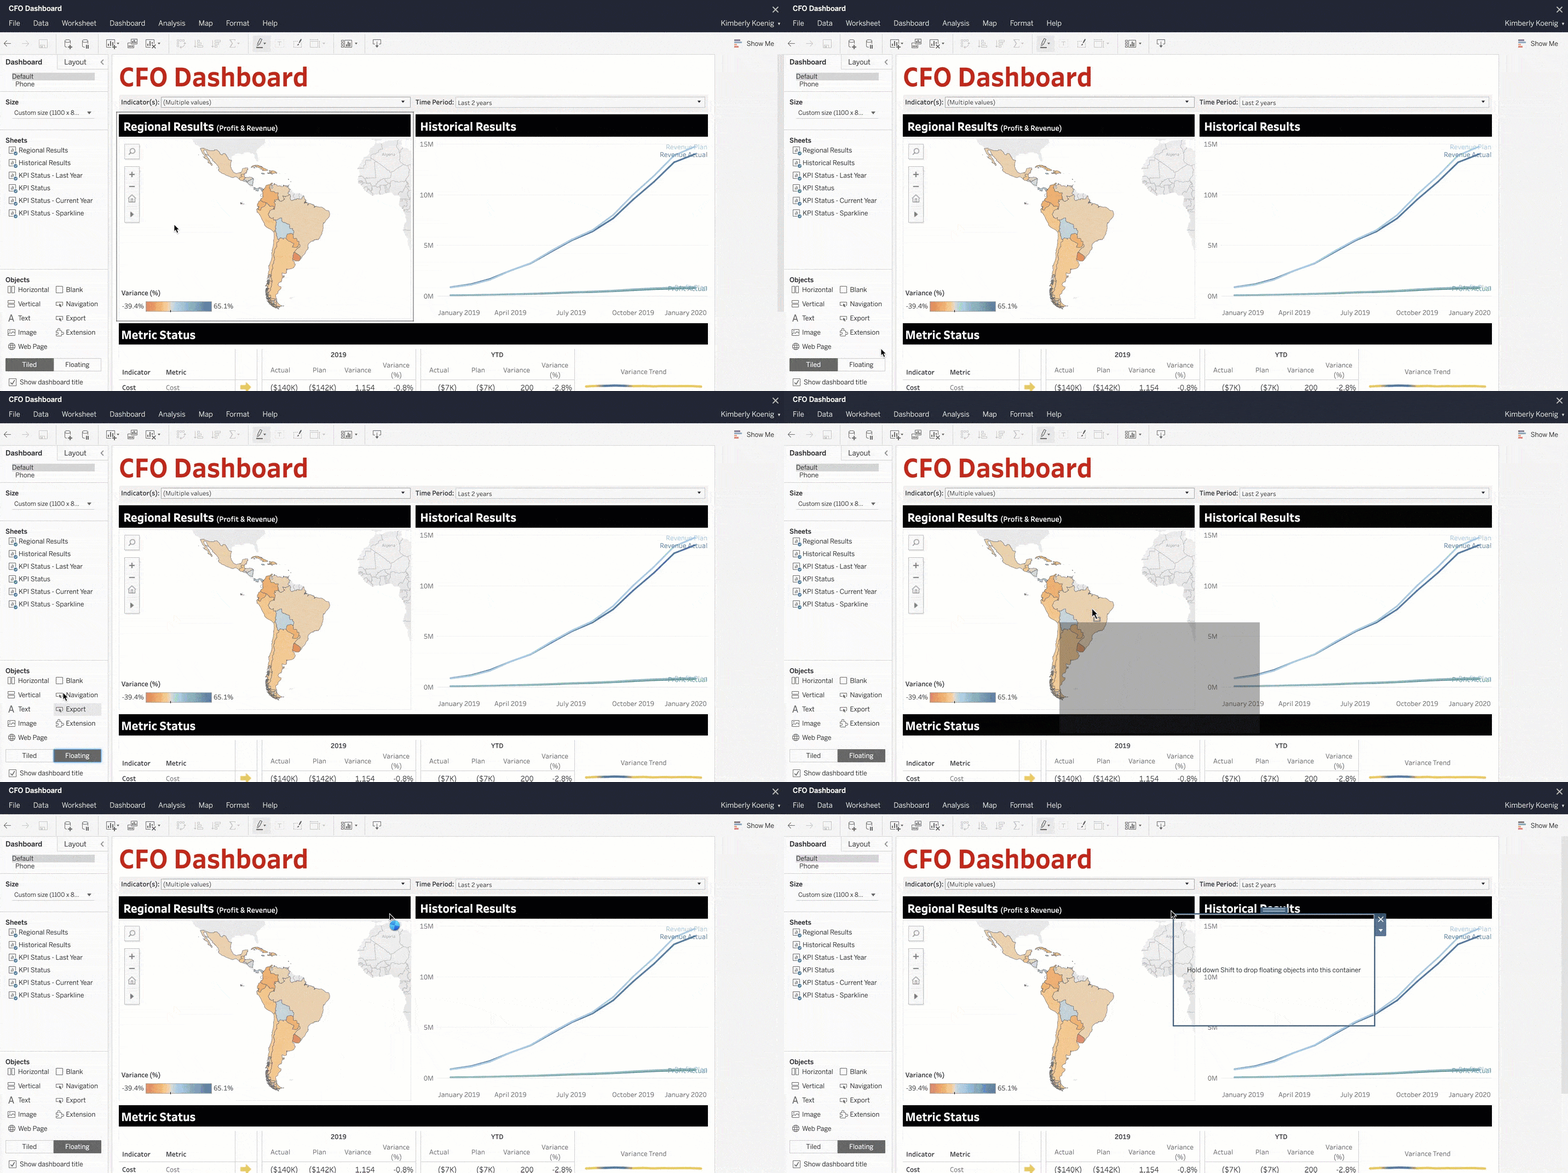
- Insert a floating container object.
- Pick the dashboard into which you want to add the Ask Data object and enter editing mode.
- Under Objects in the Dashboard pane, click Floating.
- Drag a vertical or horizontal floating container into your dashboard.
- Embed Ask Data with a Web Page object.
- Under Objects in the Dashboard pane, click Tiled, then drag a Web Page object inside the floating container you added previously.
- When prompted for a URL, paste the Ask Data URL you just copied.
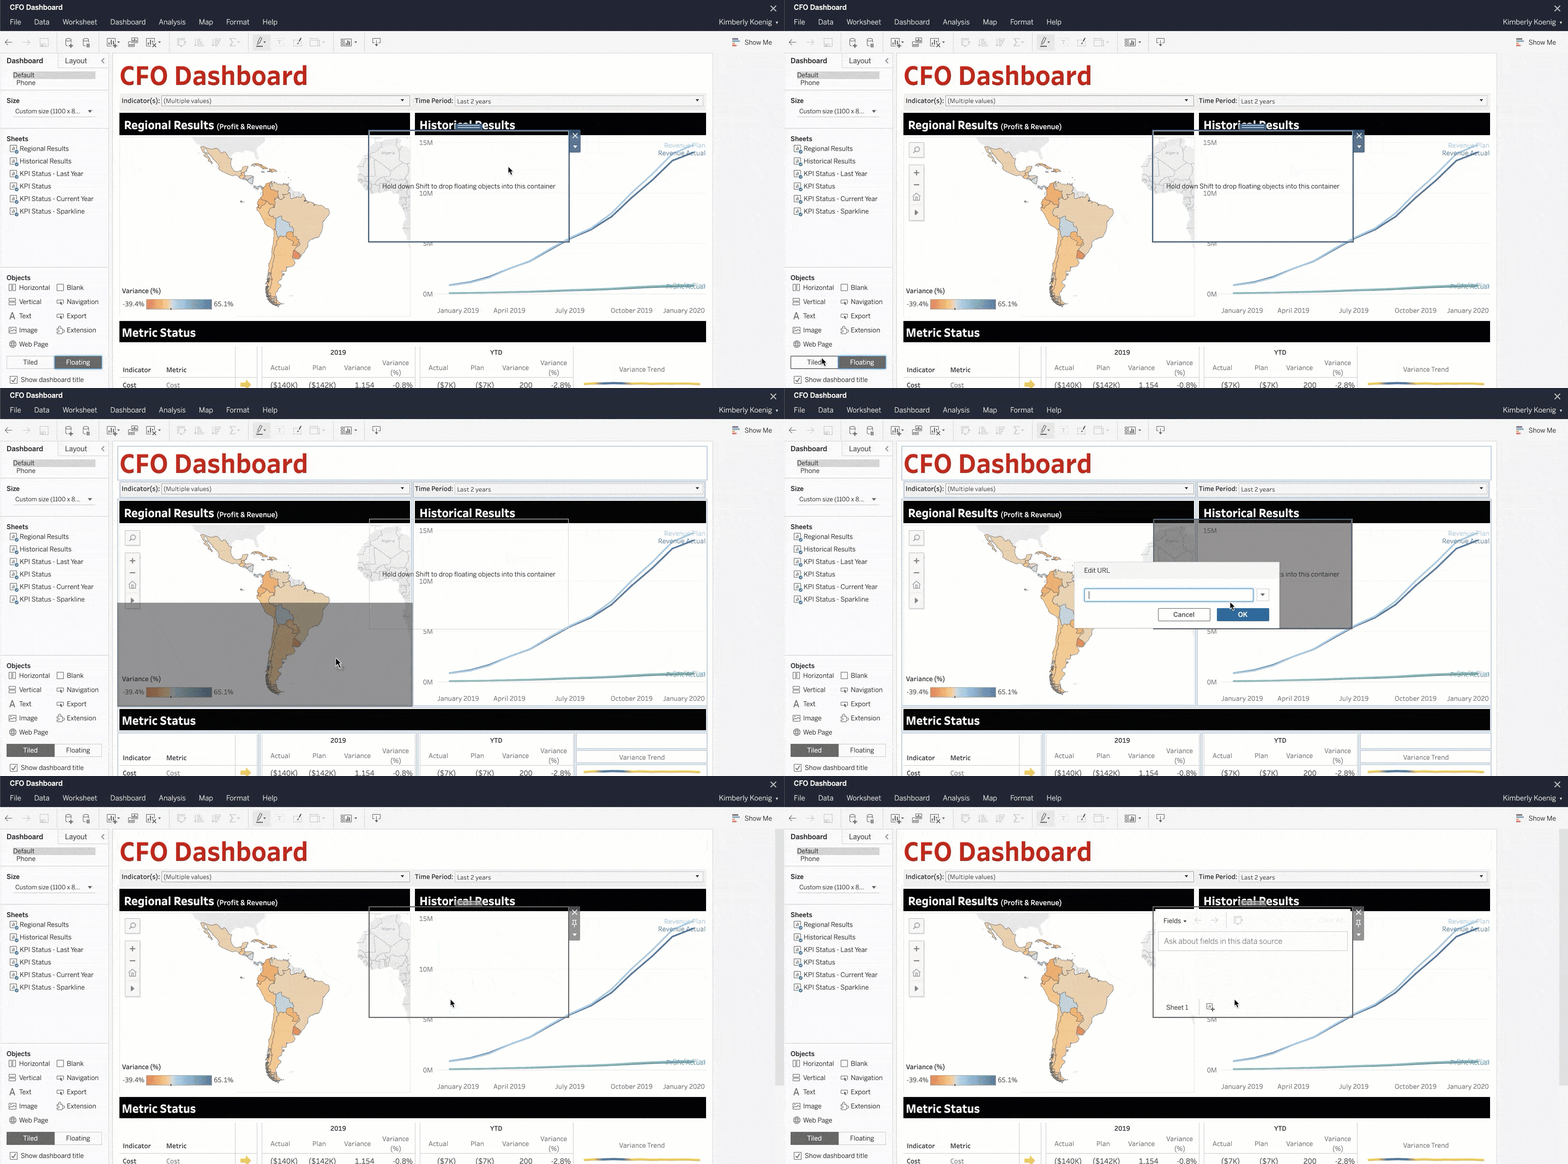
Permissions determine who can use Ask Data once it’s embedded in the dashboard. Just Creators and Explorers with access to the data source page can also see and use the Ask Data web page inside this object.
- Finishing touches.
- Click the “More Options” arrow at the container’s upper right corner, then select “Add Show/Hide Button.”
- Drag the show/hide button wherever you want it. This is what will open and close the Ask Data dialog.
- Drag the Ask Data container wherever you want Ask Data to appear on the dashboard when the button is clicked. (Many choose to place it close to the show/hide button, but there are some cases where you might not want to.)
- Size the container to your liking.
- Customize the show/hide button appearance by adding a custom image or text. If you’d like, you can set a different image or text for the shown and hidden states. Adjust the button afterward if needed.
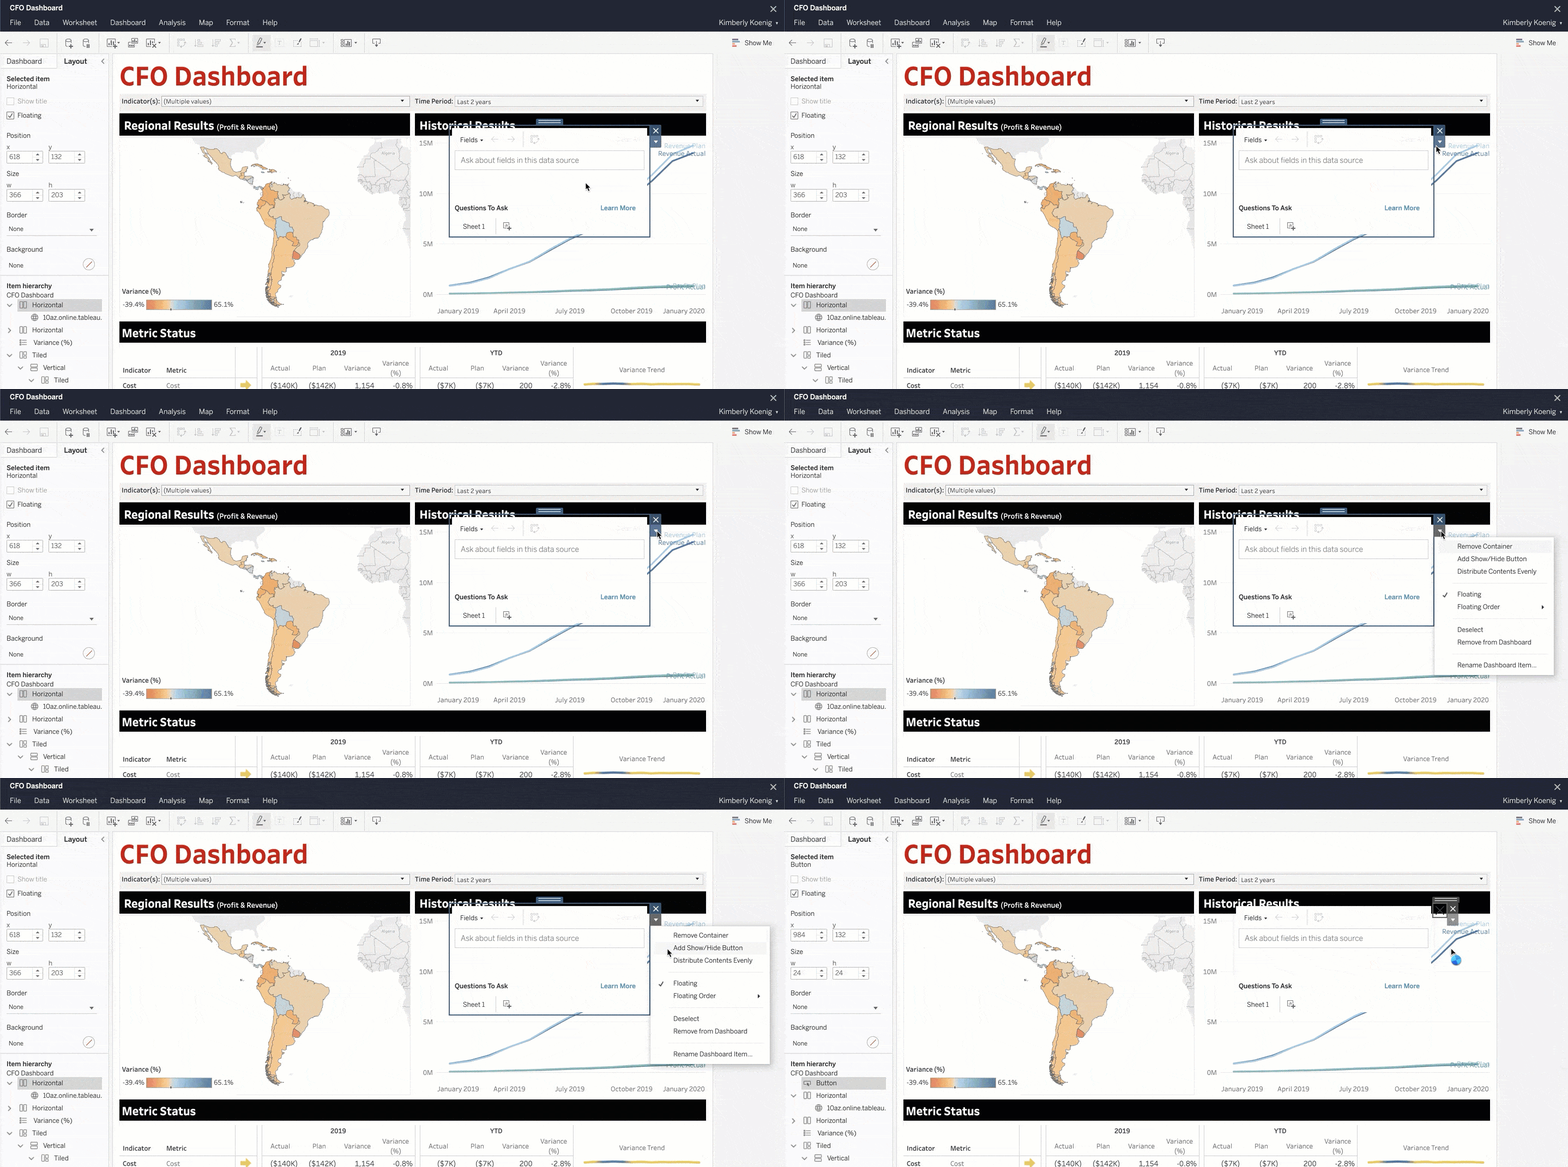
Show/hide buttons toggle the visibility of whatever contents are inside a floating container, from vizzes to images and websites. In this case, it allows you to create a collapsible Ask Data menu for your users.
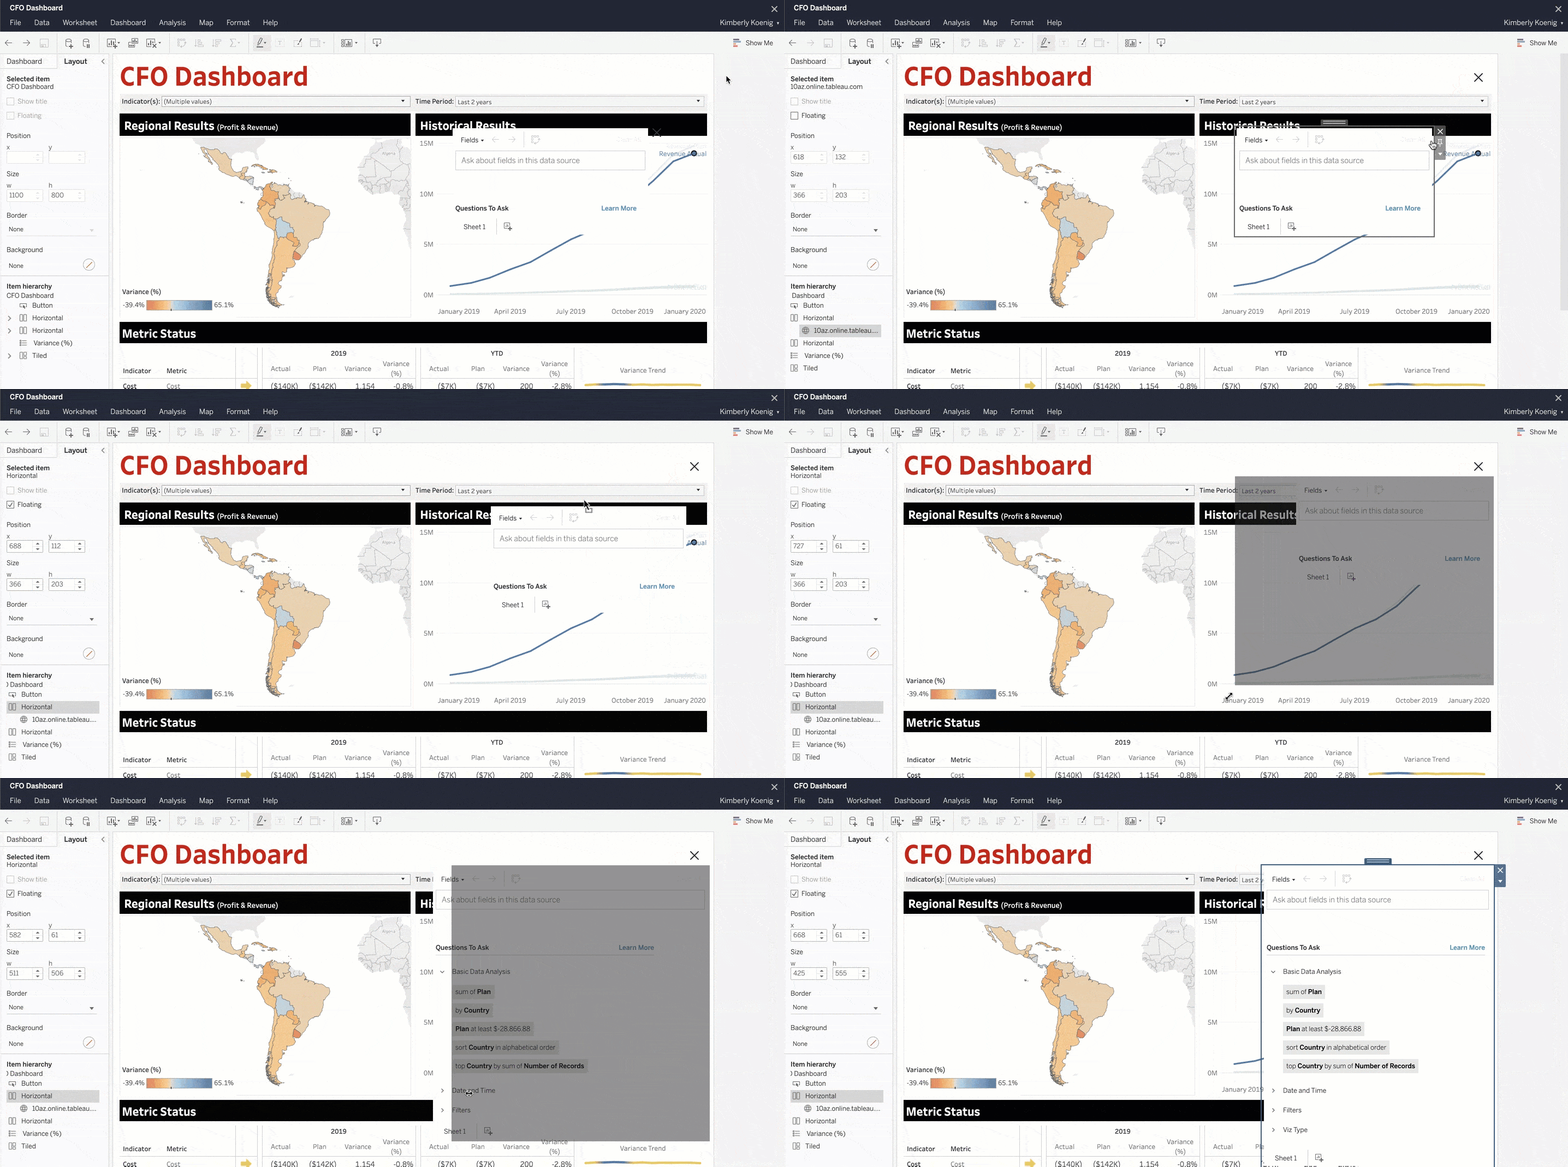
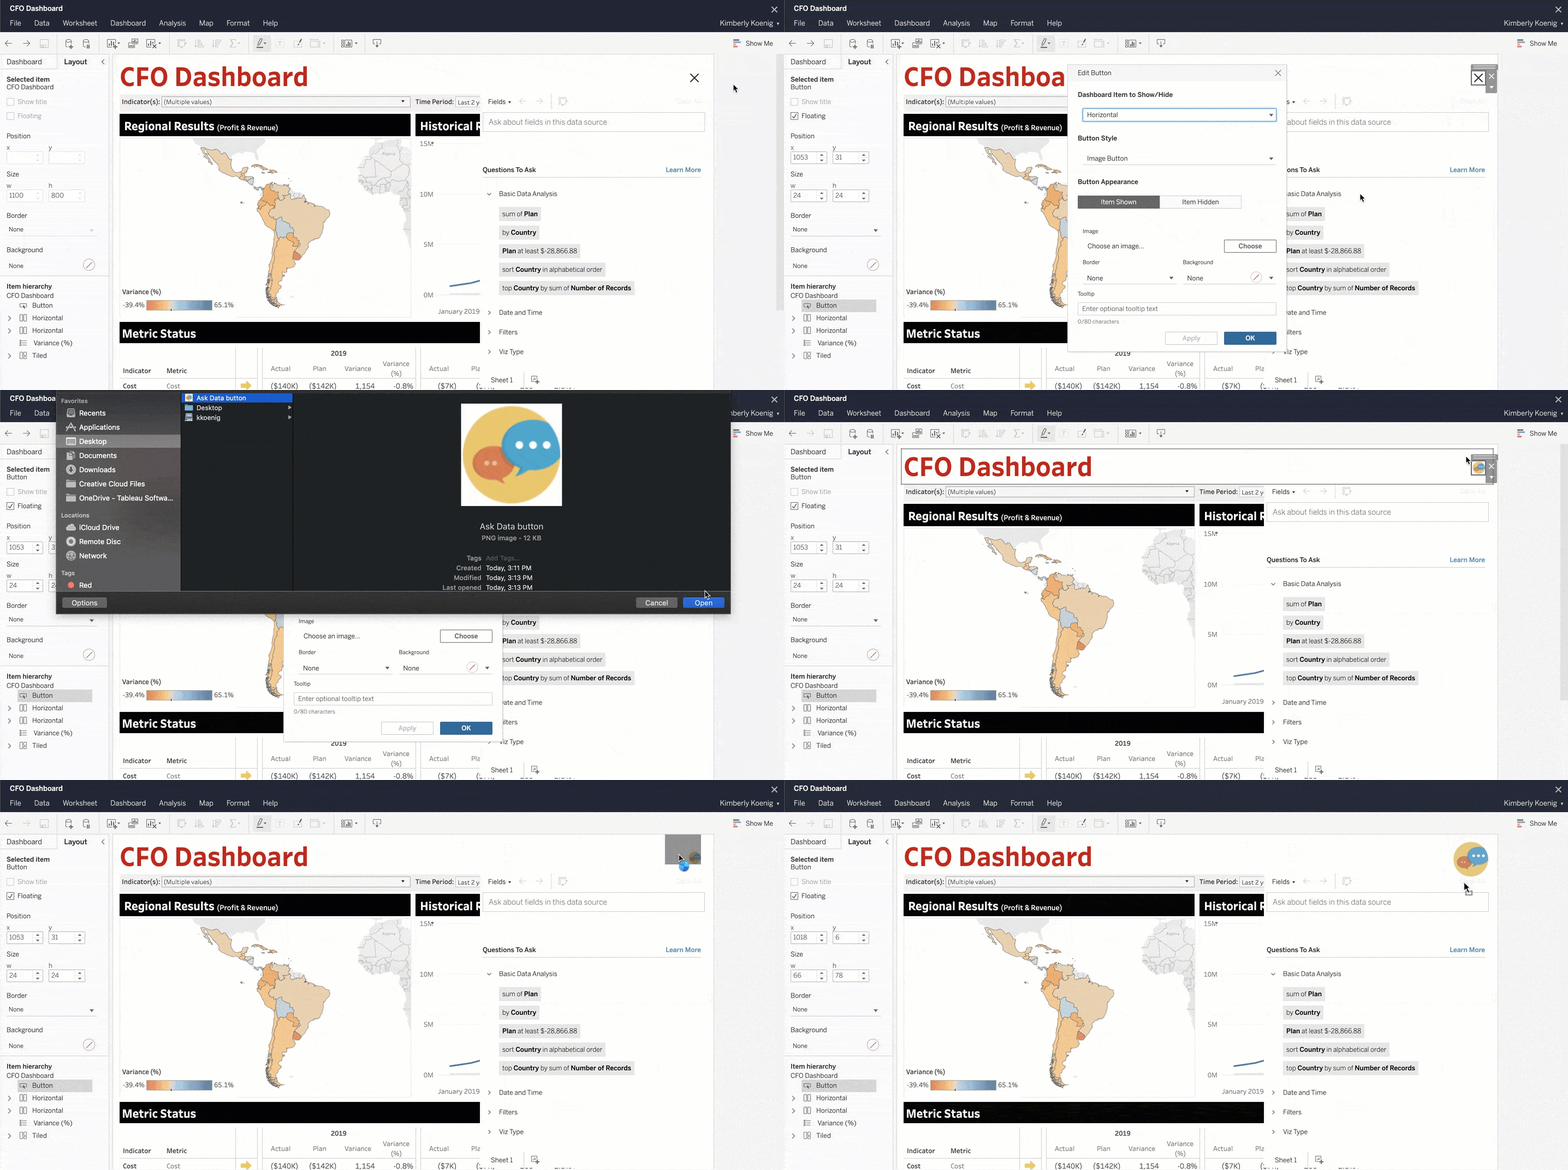
That’s it! Now that Ask Data is in your dashboard, we invite you to experiment, refine, and share.
- Experiment with Ask Data by asking natural language questions using the dashboard object or on the data source page.
- Refine by adding synonyms to your dataset. Synonyms can make your data feel even more approachable and relevant, producing great results from terms people commonly use. For example, sales users might enter “revenue,” “income,” and “earnings” to ask questions about a “sales” field.
You should also try some test questions. Are the questions you anticipate your users asking, delivering the answers you’d expect? If not, consider tweaking the data source by renaming or adding/removing fields, applying data source level filters, or setting default formats and aggregations.
- Share your new amped-up Ask Data dashboard with others in your organization. Find out what they think, and please report back. Tell us how it’s going and let us know your thoughts.
Psst—calling all customers
If you’re passionate about advancing self-service analytics, we’re looking for partner organizations that are going all-in on making data more accessible with Ask Data.
If this sounds like you or your company, we want to hear from you. We’re offering an upcoming Ask Data customer program targeted at helping customers light up their Ask Data use cases and make true self-service a reality.
Whether your company is just starting out or already partly there, we’d love to work with you. Reach out via email to get in touch.
Related stories
Subscribe to our blog
Get the latest Tableau updates in your inbox.


