Scaffold data with Tableau Prep to fill gaps in your data set
Have you ever worked with a data set that has critical gaps, keeping you from seeing a comprehensive view of your data when you bring it into Tableau? Learn how to scaffold the data set to fill in the gaps.
Have you ever worked with a data set that has critical gaps, keeping you from seeing a comprehensive view of your data when you bring it into Tableau?
As a Product Consultant at Tableau, I have the privilege of working with organizations big and small to solve tricky analytics problems. One of the most common problems I’ve seen with customers and in the Community forums is around how to scaffold data. As The Information Lab explained, in Tableau, you may need to scaffold because Tableau will only represent marks where there are rows of data. You need to scaffold the data set to fill in the gaps.
This data challenge arises in a lot of use cases, including the healthcare space with data related to admitted and discharged patients, and in operations with data on open and closed tickets. In this blog post we will be taking the role of a human resources analyst who is tasked with calculating metrics like turnover and headcount.
When you should scaffold data
Let’s say you’re looking at HR data. A common way to store data about employee tenure looks like this:
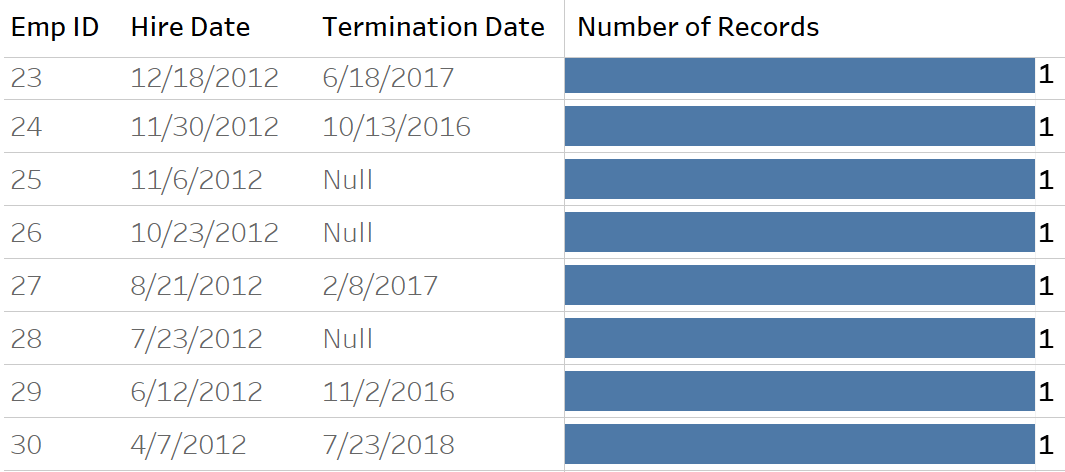
Each employee at the organization is assigned an employee ID. Two additional columns provide the employee’s hire data and termination date, and the termination date is NULL if the employee still works at the organization. This data structure makes sense from a database perspective because it's efficient and takes up little space. Each employee gets one record and that one record contains all their information. But this structure isn’t ideal for analysis in Tableau. You will need to restructure this data to understand how each date relates to an event.
This is where scaffolding comes in. You’ll need a record to represent employee tenure at the daily level. In other words, you need a record for every day that an employee worked at the organization.
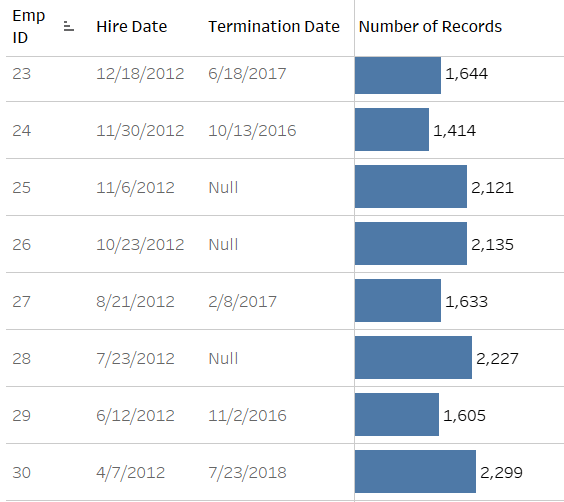
Our restructured data will look more like this.
In order to scaffold, you need a date dimension (date_dim) table—a table that contains one column, with one record per day and no missing dates. These tables look something like this:
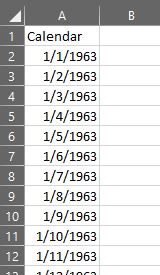
If you’re connected to a database like SQL Server that is managed by a database administrator, chances are this table already exists in your database (they’re a standard at most organizations). But, you can also just create an Excel file that has the dates you need.
Scaffolding data in Tableau Prep
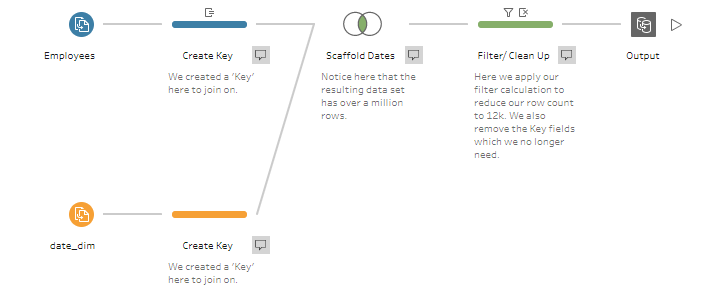
Here is what the finished Prep flow looks like. Start by bringing in your headcounts table—the table with one row per employee. In your first Clean step in Tableau Prep, create a dummy calculation:
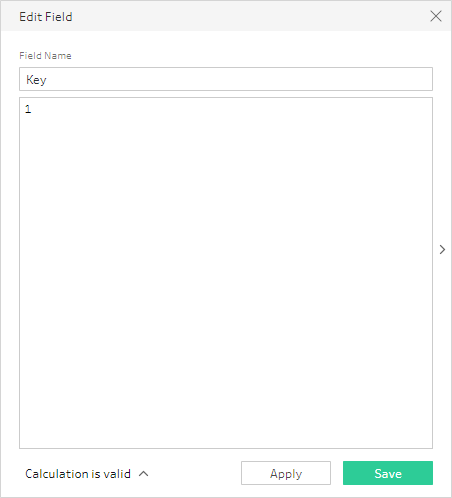
This calculation will allow you to join to the date_dim table. Next, connect to the date_dim table and do the same thing—create a dummy key field to join your fields on.
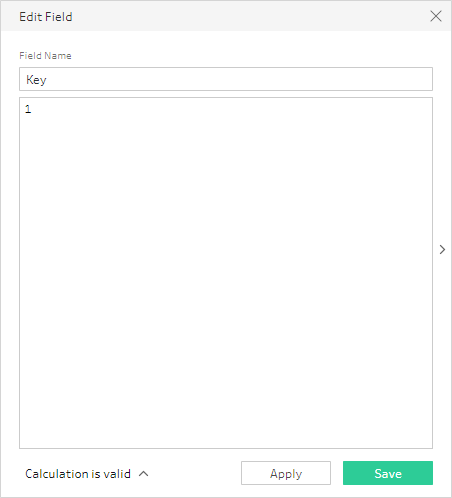
Now you can join the two tables together. Since the field we are using as our join key is just the number 1, the resulting table is going to have a much higher row count: 3,145,728 to be exact. This duplication occurs because we are joining every row of our first table to every row of the calendar table. This is helpful because we’ve changed the granularity of our date field and now have a record for every day that an employee worked at a company. This allows us to ask the more complex questions necessary for an accurate turnover rate. Now we can calculate measures like ‘average daily headcount’ rather than only being able to consider the headcount at the end of the year.
But, we are also left with many extraneous records.
Say you worked at a company for 30 days, but your date_dim table extended back to 1964, the year your company was founded. You’d have a record for every single day, running back to 1964, when you only need 30 records. Apply this to hundreds of employees, and you’re left with a huge data set.
To correct this, in the next step, filter out any unnecessary records with a calculation:
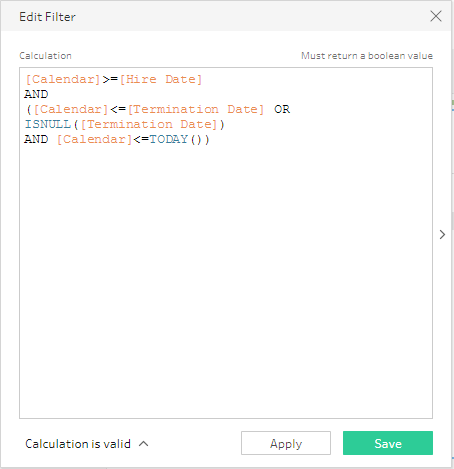
This calculation has 3 parts to it:
- Part one trims dates prior to an employee’s hire date.
[Calendar] >= [Hire Date]
- Part two trims dates post termination date.
([Calendar]) = [Termination Date] OR ISNULL([Termination Date])
- Finally, part three trims out any dates that haven’t happened yet. The date_dim table extends into the future, which is good. You don’t have to manually add a record for every day.
AND [Calendar] = TODAY())
Once we apply this using the ‘Filter data’ option in Prep, we’re left with 12,186 rows instead of the 3,145,728 we had before.
Analyzing the scaffolded data set in Tableau Desktop
With the data prepped, you can output it and bring it into Tableau Desktop for analysis. In Tableau Desktop, you will write three calculations:
1. Terminations – This calculation gives us a count of terminated employees per year.
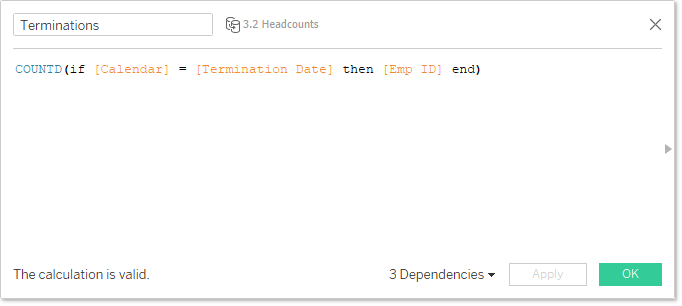
Using logic, check when Calendar is equal to the Terminate Date. If so, you can ask Tableau to return the Employee ID and then take a count of those employees.
2. Average Daily Headcount – This calculation finds the daily headcount and then averages it.
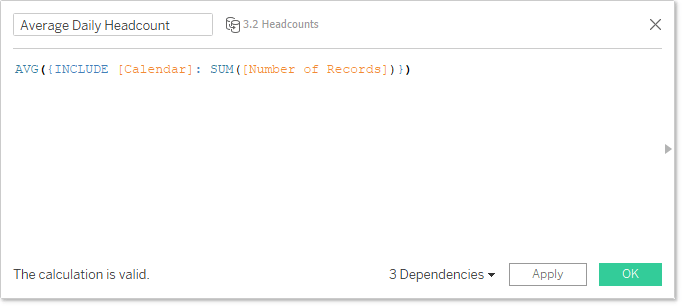
In our new, scaffolded dataset, we have a record for every day each employee worked at the organization. We use the INCLUDE function here because our view looks at this data at the yearly level, but we want to consider headcount at the daily level. We are including that lower level of granularity. The AVG() around the entire calculation gives us the average daily headcount.
3. Accurate Turnover Rate – Uses calculations one and two to find our more accurate turnover rate.
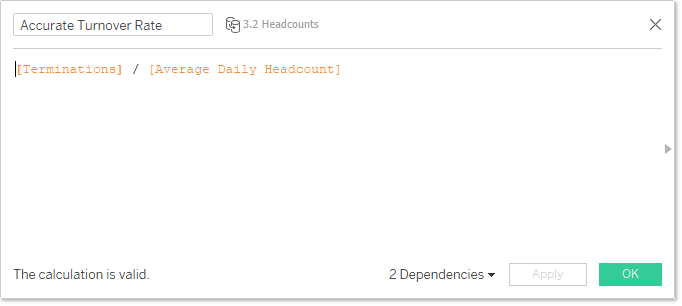
Finally, if we divide Terminations by the Average Daily Headcount, we get our accurate turnover rate.
Now let’s build the viz:
There we have it. Now you’ve learned how to scaffold a data set in Tableau Prep and take advantage of this data set to analyze turnover and headcount rates in Tableau Desktop.
If you want to further your learning, check out the recording of my breakout session from Tableau Conference this year: “Solving tough time-based problems with skeleton tables and Tableau Prep.” My co-presenter Archana and I go through three additional use cases around scaffolding data with Tableau Prep.
To learn more about using Tableau Prep, check out this list of resources.
Related Stories
Subscribe to our blog
Get the latest Tableau updates in your inbox.


